React入門(7):React NativeでiOSアプリケーションを開発してみた
モチベーション
React Nativeを使ったiOSアプリケーションの開発フローを経験する
React Nativeとは?
React NativeはReact.jsを使ったネイティブアプリケーション開発を可能にさせるSDKのことで、Facebookが2015年に公開したもの。FacebookはReact Native: Bringing modern web techniques to mobileでReact Nativeについて以下のように説明している。
We’ve been using React Native in production at Facebook for some time now, and while there’s still a ton of work to do, it’s been working really well for us. It’s worth noting that we’re not chasing “write once, run anywhere.” Different platforms have different looks, feels, and capabilities, and as such, we should still be developing discrete apps for each platform, but the same set of engineers should be able to build applications for whatever platform they choose, without needing to learn a fundamentally different set of technologies for each. We call this approach “learn once, write anywhere.”
“learn once, write anywhere.“。要するに、プラットフォームごとに新しい言語やフレームワークを覚えるのは嫌だ!!Reactだけ覚えてそれで全てのプラットフォームに対応して行こうぜ!!って考えらしい。僕みたいにSwiftやJavaでのモバイル・アプリケーションのスキルは身に付ける時間は無いけど、”javascriptなら”、って人や”Rapid Prototypingでとりあえず動くものを作りたい”、って人には向いている気がする。とはいえ、Facebookの一部のネイティブアプリケーション開発に既に導入されており、App Storeに公開されているFacebook GroupsはReact Nativeを使って開発されてたりするので、実用レベルにも耐えうるようだ。
今回は、React.jsに少し慣れてきたので同じ記法でネイティブアプリケーションを本当に開発できるのか体験しようと思う。
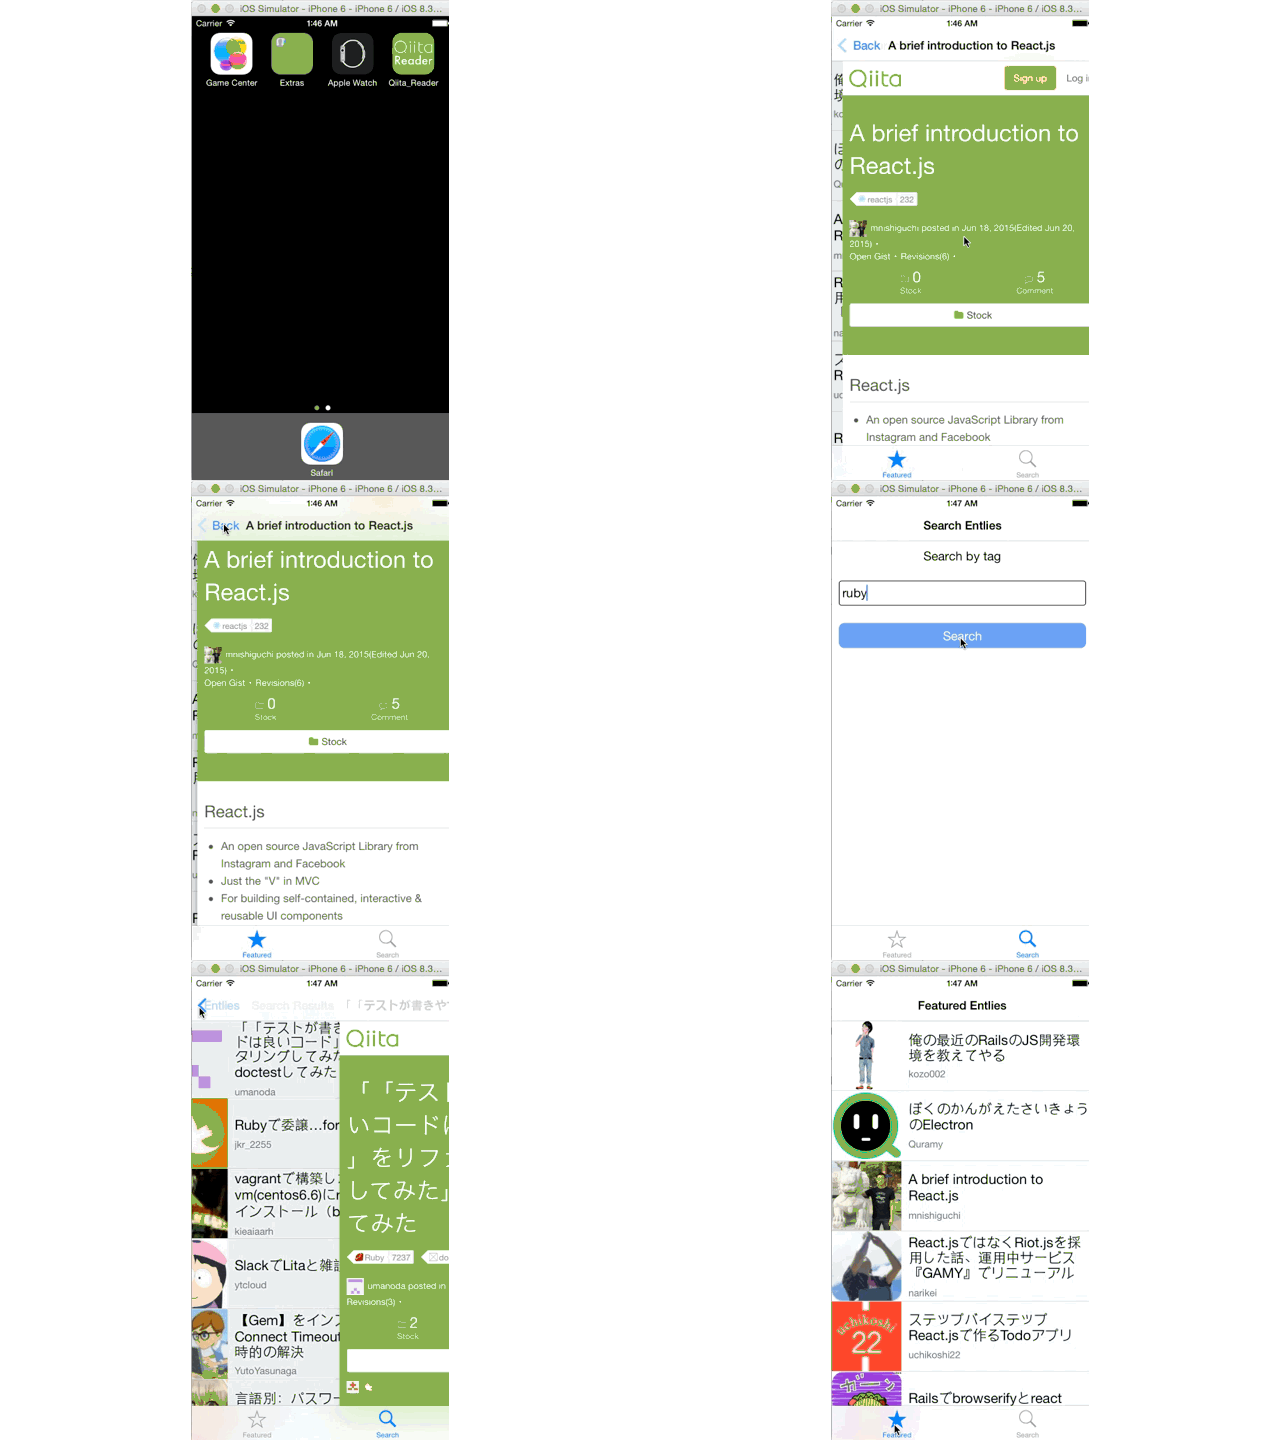
こんな感じのiOSアプリケーションができました
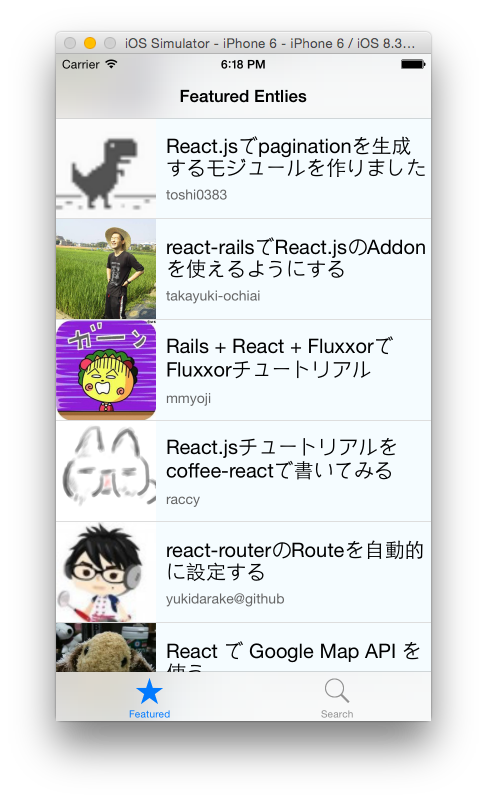
今回作成するアプリケーションはこんな感じ。また、完成系のファイルはここに置いてある。
このアプリケーションは2つの機能を持っており、1つはQiitaの特定のタグの最新エントリーを取得して表示させる機能、もう一つはタグを検索してそのタグの最新エントリーを取得して表示させる機能。機能が幾分被っているが、気にしないで欲しい。
Componentとファイル構成
作成するアプリケーションのComponentとjavascriptファイルの構成は以下の通り(ViewとかTextとか細かい単位は省略)。
- Qiita_Reader ・・・ index.ios.js
    - TabBarIOS  ・・・ index.ios.js
        - TabBarIOS.Item  ・・・ index.ios.js
           - FeaturedTab  ・・・ FeaturedTab.js
             - NavigatorIOS  ・・・ FeaturedTab.js
               - EntryList  ・・・ EntryList.js
                 - EntryDetail  ・・・ EntryDetail.js
        - TabBarIOS.Item  ・・・ index.ios.js
           - SearchTab  ・・・ SearchTab.js
             - NavigatorIOS  ・・・ SearchTab.js
             - SearchEntry  ・・・ SearchEntry.js
               - SearchResult  ・・・ EntryList.js
                 - EntryDetail  ・・・ EntryDetail.js
index.ios.jsに全てのComponentを記述するのではなく、Componentの役割ごとにファイルを分割しexport.modulesを利用してモジュール化する。また、Componentが必要な時はvar Component名 = require('モジュールまでのパス')で利用するのが味噌。
実際に作ってみよう
準備
React Native | A framework for building native apps using React
に従い、npmでreact-native-cliをインストールして、Xcodeプロジェクトをreact-native initで作る。
> npm install -g react-native-cli
> react-native init Qiita_Reader
プロジェクトを作成したら、Qiita_Reader/Qiita_Reader.xcodeprojをダブルクリックしてXcodeを開く。Cmd + Rを実行すると以下のメッセージが出てくると同時にiOSシミュレータも起動する。
 ===============================================================
 |  Running packager on port 8081.
 |  Keep this packager running while developing on any JS
 |  projects. Feel free to close this tab and run your own
 |  packager instance if you prefer.
 |
 |     https://github.com/facebook/react-native
 |
 ===============================================================

Looking for JS files in
   /Users/takanabe/Qiita_Reader


React packager ready.
これで準備が整った。
TabBarを追加する
TabBarで表示させるコンテンツの編集を行うために、index.ios.jsと同じディレクトリにFeaturedTab.jsとSearchTab.jsを追加する。
続いて、FeaturedTab.jsを開き以下のようにコードを編集する。
'use strict';

var React = require('react-native');

var {
  StyleSheet,
  Text,
  View,
} = React;

var FeaturedTab = React.createClass({
  render: function() {
    return (
      <View style={styles.container}>
        <Text style={styles.description}>This is Featured Tab !!</Text>
      </View>
    );
  }
});

var styles = StyleSheet.create({
  container: {
    flex: 1,
    justifyContent: 'center',
    alignItems: 'center',
  },
  description: {
    fontSize: 15,
    backgroundColor: '#FFFFFF'
  }
});

module.exports = FeaturedTab;
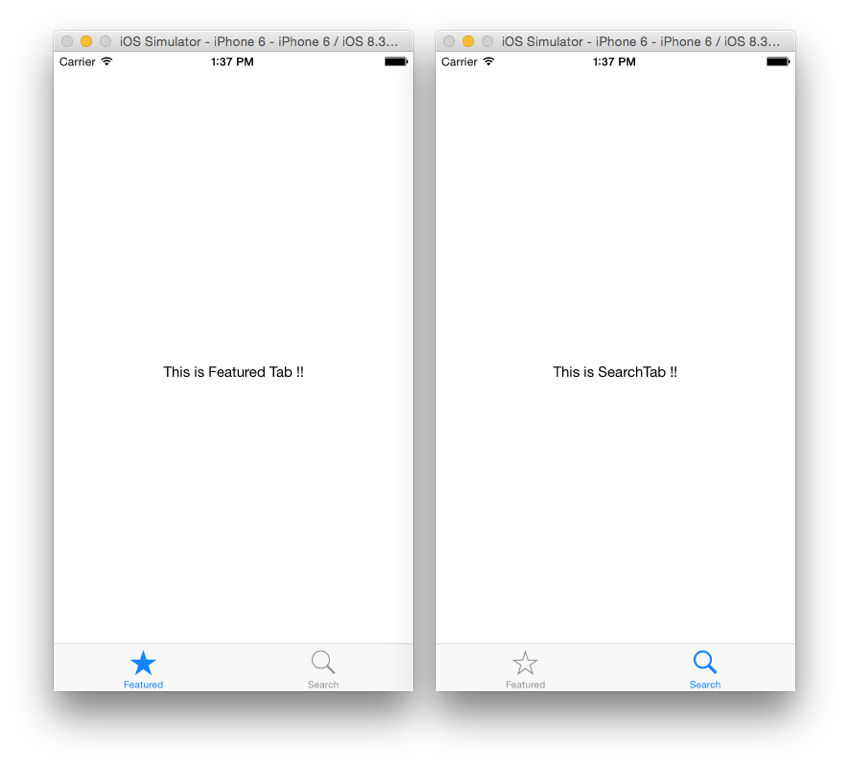
React.jsの記法を理解してれば慣れ親しんだコードだと思う。特筆すべき点としてはReact NativeではCSSは使わずにStylesSheet.createで定義したスタイルをそれぞれのComponentに適用することで、Viewのレイアウトを決める。書き方自体は従来のCSSと同じであるためすんなりと理解できる。また、スタイルの定義はFlexBoxに対応しており、flex: 1するとFlexBoxスタイルが有効になる。利用可能なFlexBoxプロパティはReact Native | A framework for building native apps using Reactを参照のこと。最後の1行のコードで外部でFeaturedTab Componentをモジュールとして利用可能にしている。
module.exports = FeaturedTab;
SearchTab.jsも同様に以下のようにコードを編集する。表示させるテキスト以外はFeaturedTab.jsと同じである。
'use strict';

var React = require('react-native');

var {
  StyleSheet,
  Text,
  View,
} = React;

var SearchTab = React.createClass({
  render: function() {
    return (
      <View style={styles.container}>
        <Text style={styles.description}>This is SearchTab !!</Text>
      </View>
    );
  }
});

var styles = StyleSheet.create({
  container: {
    flex: 1,
    justifyContent: 'center',
    alignItems: 'center',
  },
  description: {
    fontSize: 15,
    backgroundColor: '#FFFFFF'
  }
});

module.exports = SearchTab;
TabBarで表示させるコンテンツの準備が完了したのでTabBar本体の実装をして行く。index.ios.js を開き以下のように編集する。
'use strict';

var React = require('react-native');
var FeaturedTab = require('./FeaturedTab.js');
var SearchTab = require('./SearchTab.js');

var {
  AppRegistry,
  StyleSheet,
  Text,
  View,
  TabBarIOS
} = React;

var Qiita_Reader = React.createClass({
  getInitialState: function(){
    return(
      {
        selectedTab: 'FeaturedTab'
      }
    );
  },
  render: function() {
    return (
      <TabBarIOS selectedTab={this.state.selectedTab}>
        <TabBarIOS.Item
          selected={this.state.selectedTab === 'FeaturedTab'}
          icon={{uri: 'featured'}}
          onPress={() => {
            this.setState(
              {selectedTab: 'FeaturedTab'}
            );
          }}
        >
          <FeaturedTab />
        </TabBarIOS.Item>
        <TabBarIOS.Item
          selected={this.state.selectedTab === 'SearchTab'}
          icon={{uri: 'search'}}
          onPress={() => {
            this.setState(
              {selectedTab: 'SearchTab'}
            );
          }}
        >
          <SearchTab />
        </TabBarIOS.Item>
      </TabBarIOS>
    );
  }
});

var styles = StyleSheet.create({
  container: {
    flex: 1,
    justifyContent: 'center',
    alignItems: 'center',
    backgroundColor: '#F5FCFF',
  },
  welcome: {
    fontSize: 20,
    textAlign: 'center',
    margin: 10,
  },
  instructions: {
    textAlign: 'center',
    color: '#333333',
    marginBottom: 5,
  },
});

AppRegistry.registerComponent('Qiita_Reader', () => Qiita_Reader);
TabBarIOSの子ComponentTabBarIOS.Itemを追加してTabBarを追加している。また、さきほど作成したFeaturedTabとSearchTabComponentはTabBarIOS.Itemの子Componentとした。TabBarIOS.ItemComponentで使えるプロパティはReact Native | A framework for building native apps using Reactにある通り。今回iconプロパティのuriで指定してるfeaturedとsearchはデフォルトでiOSアプリ作成用に用意されているものを使っている。uriをhistoryやbookmarksに変えるだけでiconを変更できる。
他にどんなiconが使えるかはiOS Human Interface Guidelines: Barsを見て欲しい。ともあれ、ここまでの画面はご覧のとおり。
Navigation Barを追加する
続いてNavigation Barを追加する。EntryList.jsとSearchEntry.jsをQiita_Readerプロジェクトに追加して、EntryList.jsを以下の用に編集する。
'use strict';

var React = require('react-native');

var {
  StyleSheet,
  Text,
  View,
} = React;

var EntryList = React.createClass({
  render: function() {
    return (
      <View style={styles.container}>
      <Text style={styles.description}>This is Entry List Component !!</Text>
      </View>
    );
  }
});

var styles = StyleSheet.create({
  container: {
    flex: 1,
    flexDirection: 'row',
    alignItems: 'center',
    justifyContent: 'center',
  },
  description: {
    fontSize: 18,
    backgroundColor: "#FFFFFF"
  }
});

module.exports = EntryList;
この時、styles.containerでflexDirection: 'row'とした場合alignItems: 'center'としないとこの後追加するNavigation BarにTextComponentが被さってしまい文字が隠れてしまうので注意。また、表示する文字列を中央に寄せたい場合はjustifyContent: 'center'も追加する。このあたりはFlexBoxの範疇なので理解していない場合は先に修得する必要あり。同様に、SearchEntry.jsも以下のように編集する。
'use strict';

var React = require('react-native');

var {
  StyleSheet,
  Text,
  View,
} = React;

var SearchEntry = React.createClass({
  render: function() {
    return (
      <View style={styles.container}>
        <Text style={styles.description}>This is Search Entry Component !!</Text>
      </View>
    );
  }
});

var styles = StyleSheet.create({
  container: {
    flex: 1,
    flexDirection: 'row',
    alignItems: 'center',
    justifyContent: 'center',
  },
  description: {
    fontSize: 18,
    backgroundColor: "#FFFFFF"
  }
});

module.exports = SearchEntry;
EntryList.jsとSearchEntry.jsの編集が終わったら再度FeaturedTab.jsを開き以下のようにコードを変更する。
'use strict';

var React = require('react-native');
var EntryList = require('./EntryList.js');

var {
  StyleSheet,
  NavigatorIOS
} = React;

var FeaturedTab = React.createClass({
  render: function() {
    return (
      <NavigatorIOS
        style={styles.container}
        initialRoute={{
          title: 'Featured Entlies',
          component: EntryList
        }} />
    );
  }
});

var styles = StyleSheet.create({
  container: {
    flex: 1,
  }
});

module.exports = FeaturedTab;
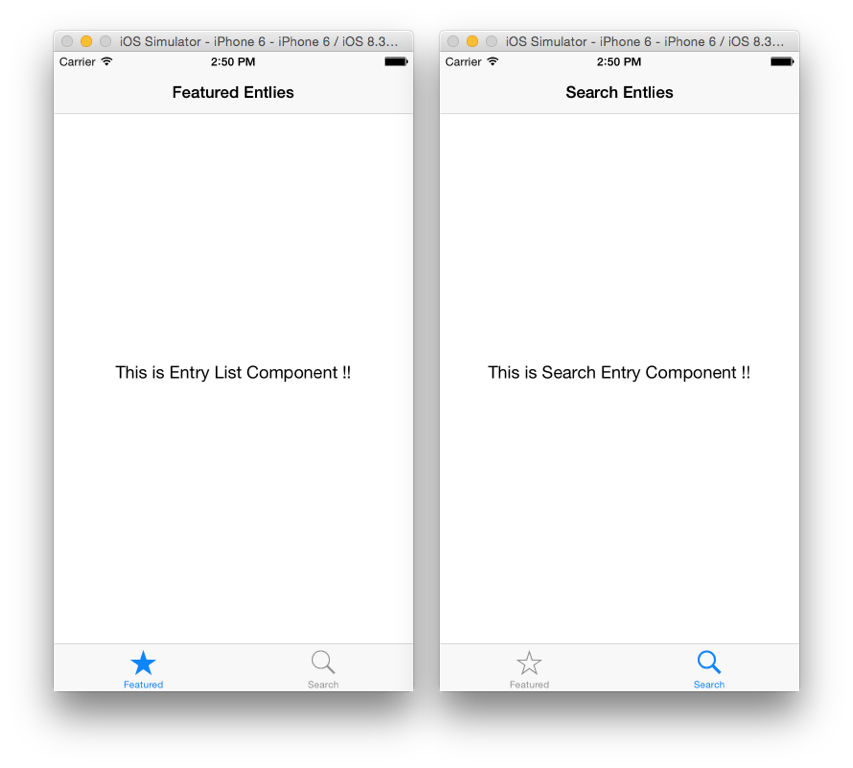
NavigatorIOSのinitialRouteのtitileがNavigartion Barに表示する文字列、componentがどのComponentを利用するかをハンドリングしている。ここでは先ほど作成したEntryList ComponentをNavigatorIOSが表示するComponentとしている。同様に、SearchTab.jsを以下のように編集する。
'use strict';

var React = require('react-native');
var SearchEntry = require('./SearchEntry.js');

var {
  StyleSheet,
  NavigatorIOS
} = React;

var SearchTab = React.createClass({
  render: function() {
    return (
      <NavigatorIOS
        style={styles.container}
        initialRoute={{
          title: 'Search Entlies',
          component: SearchEntry
        }} />
    );
  }
});

var styles = StyleSheet.create({
  container: {
    flex: 1,
  }
});

module.exports = SearchTab;
Navigation Barの追加が完了した。今までの実装をシミュレーションで表示させるとこのようになる。
JSONデータを表示させてみる
続いて、EntryList.jsでテストデータを表示してみる。今回作成しているアプリケーションは最終的にQiitaで公開されているAPIを使ってJSONデータを取得し、それらを表示させるものにしたい。従って、テストデータもJSON形式のものをEntryList.jsに追加する。
var TEST_ENTRY_DATA = [
  {
    user: {
      profile_image_url: 'http://facebook.github.io/react/img/logo_og.png',
      id: 'takanabe'
    },
    title: 'React Native Test!!'
  }
];

var entry = TEST_ENTRY_DATA[0];
Componentは画像データを表示するためにImageを追加する。
var {
  StyleSheet,
  Text,
  View,
  Image
} = React;
また、EntryList Componentは以下のように編集する。
var EntryList = React.createClass({
  render: function() {
    return(
      <View style={styles.container}>
        <Image
        source={{uri: entry.user.profile_image_url}}
        style={styles.thumbnail}/>
        <View style={styles.rightContainer}>
          <Text style={styles.title}>{entry.title}</Text>
          <Text style={styles.name}>{entry.user.id}</Text>
        </View>
      </View>
    );
  }
});
最後にスタイルの変更を以下のように行う。
var styles = StyleSheet.create({
    container: {
        flex: 1,
        flexDirection: 'row',
        justifyContent: 'center',
        alignItems: 'center',
        backgroundColor: '#F5FCFF',
        padding: 10
    },
    thumbnail: {
        width: 100,
        height: 100,
        marginRight: 10
    },
    rightContainer: {
        flex: 1
    },
    title: {
        fontSize: 20,
        marginBottom: 8
    },
    name: {
        color: '#656565'
    }
});
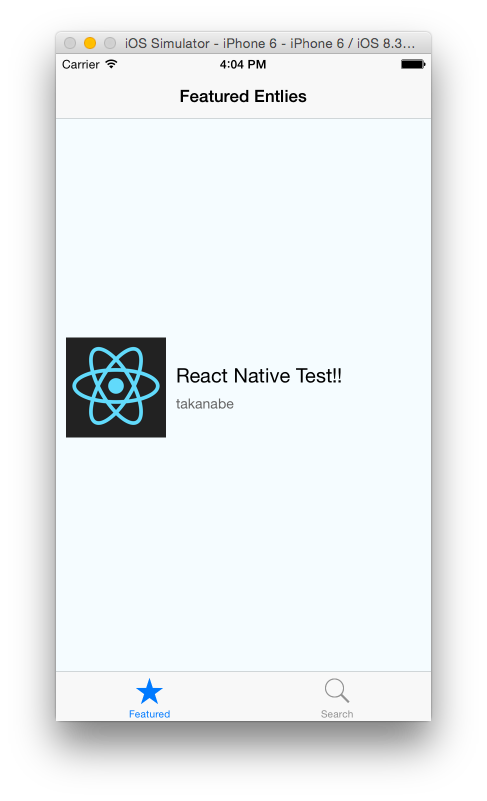
以上より、EntryList ComponentにJSONデータが表示されるようになった。
JSONデータをList Viewで表示する
JSONデータが無事表示できるようになったので今度は複数のJSONデータをList View Component(iOS用語ではScroll View)を使って表示してみる。再度EntryList.jsを開きListViewとTouchableHighlightComponentを追加する。
var {
  StyleSheet,
  Text,
  View,
  Image,
  ListView,
  TouchableHighlight
} = React;
続いて、ListViewで表示させるデータのハンドリングの定義を行う。ListViewの使い方はReact Native | A framework for building native apps using Reactを参照したが、rowHasChangedとかcloneWithRowsとかのより詳細な処理を確認したい場合はreact-native/ListViewDataSource.jsとreact-native/ListView.jsを読むこと。
ポイントはdataSource.cloneWithRows'には配列を渡すことで、ListView ComponentのrenderRow`関数の引数に自動的に配列の各要素がindexの若い順番から渡されること。例えば、
getInitialState: function() {
  var ds = new ListView.DataSource({rowHasChanged: (r1, r2) => r1 !== r2});
  return {
    dataSource: ds.cloneWithRows(['row 1', 'row 2']),
  };
},

render: function() {
  return (
    <ListView
      dataSource={this.state.dataSource}
      renderRow={(rowData) => <Text>{rowData}</Text>}
    />
  );
},
のように、cloneWithRowsに['row1','row2']を渡した場合、renderRowで定義しているアローファンクションはrow1を引数として実行され、続いてrow2を引数として実行される。以上を踏まえて、EntryList Componentを再度実装し直す。
var EntryList = React.createClass({
  getInitialState: function(){
    return(
      {
        dataSource: new ListView.DataSource({
          rowHasChanged: (row1, row2) => row1 !== row2
        })
      }
    );
  },
  componentDidMount: function(){
    this.setState({
      dataSource: this.state.dataSource.cloneWithRows(entries)
    });
  },
  renderEntry: function(entry){
    return(
      <TouchableHighlight>
        <View>
          <View style={styles.container}>
            <Image
            source={{uri: entry.user.profile_image_url}}
            style={styles.thumbnail}/>
            <View style={styles.rightContainer}>
              <Text style={styles.title}>{entry.title}</Text>
              <Text style={styles.name}>{entry.user.id}</Text>
            </View>
          </View>
          <View style={styles.separator}/>
        </View>
      </TouchableHighlight>
    );
  },
  render: function() {
    return(
      <ListView
        style={styles.listView}
        dataSource={this.state.dataSource}
        renderRow={this.renderEntry}
      />
    );
  }
});
この時、<View style={styles.container}> と<View style={styles.separator}/>同層のComponentとすることで境界線をひくViewがEntryを表示するViewの間に配置される。
<TouchableHighlight>
  <View>
    <View style={styles.container}>
      <Image
      source={{uri: entry.user.profile_image_url}}
      style={styles.thumbnail}/>
      <View style={styles.rightContainer}>
        <Text style={styles.title}>{entry.title}</Text>
        <Text style={styles.name}>{entry.user.id}</Text>
      </View>
    </View>
    <View style={styles.separator}/>
  </View>
</TouchableHighlight>
最後に、ListViewの境界線を引くためにstylesに以下を追加する
separator: {
       height: 1,
       backgroundColor: '#DDDDDD'
},
listView: {
       backgroundColor: '#F5FCFF'
},
ここまでで、ListViewの追加が完了した。
API経由でデータを取得して表示させる
いよいよQiitaのAPIを叩いて直接データを取得する。APIdocumentに従いreactjsのタグが付いたエントリを取得するURLを定義する。
var QIITA_REACTJS_ENTRY_URL = "https://qiita.com/api/v2/tags/reactjs/items";
APIを叩くための関数を実装する。
fetchData: function() {
  fetch(QIITA_REACTJS_ENTRY_URL)
  .then((response) => response.json())
  .then((responseData) => {
    this.setState({
      dataSource: this.state.dataSource.cloneWithRows(responseData)
    });
  })
  .done();
}
また、ListView Componentがレンダリングされた後にfetchDataを読んでListViewにデータを読み込ませる。
componentDidMount: function(){
  this.fetchData();
}
iOSシミュレータをリロードすると直近のreactjsタグが付いたエントリーをListViewで取得できる。
最後にインターネット環境によっていはデータの取得に時間がかかり、しばらくListViewに何も表示されないことがある。ここでは、Activity Indicatorをデータの取得が完了するまで表示させることでデータをロードしている途中で有ることを表現する。
'use strict';

var React = require('react-native');

var {
  StyleSheet,
  Text,
  View,
  Image,
  ListView,
  TouchableHighlight,
  ActivityIndicatorIOS
} = React;

var QIITA_REACTJS_ENTRY_URL = "https://qiita.com/api/v2/tags/reactjs/items";

var EntryList = React.createClass({
  getInitialState: function(){
    return(
      {
        dataSource: new ListView.DataSource({
          rowHasChanged: (row1, row2) => row1 !== row2
        }),
        isLoaded: false
      }
    );
  },
  componentDidMount: function(){
    this.fetchData();
  },
  fetchData: function() {
    fetch(QIITA_REACTJS_ENTRY_URL)
    .then((response) => response.json())
    .then((responseData) => {
      this.setState({
        dataSource: this.state.dataSource.cloneWithRows(responseData),
        isLoaded: true
      });
    })
    .done();
  },
  renderEntry: function(entry){
    return(
      <TouchableHighlight>
        <View>
          <View style={styles.container}>
            <Image
            source={{uri: entry.user.profile_image_url}}
            style={styles.thumbnail}/>
            <View style={styles.rightContainer}>
              <Text style={styles.title}>{entry.title}</Text>
              <Text style={styles.name}>{entry.user.id}</Text>
            </View>
          </View>
          <View style={styles.separator}/>
          </View>
      </TouchableHighlight>
    );
  },
  viewLoadingData: function(){
    return(
      <View style={styles.activityIndicator}>
      <ActivityIndicatorIOS
      animating={1}
      size={'large'}
      />
      <View>
         <Text style={styles.loadingMessage}>Pleae wait a second ...</Text>
      </View>
      </View>
    );
  },
  render: function() {
    if(this.state.isLoaded){
      return(
        <ListView
          style={styles.listView}
          dataSource={this.state.dataSource}
          renderRow={this.renderEntry}
        />
      );
    }else{
      return(
        this.viewLoadingData()
      );
    };
  }
});

var styles = StyleSheet.create({
    container: {
        flex: 1,
        flexDirection: 'row',
        justifyContent: 'center',
        alignItems: 'center',
        backgroundColor: '#F5FCFF',
    },
    thumbnail: {
        width: 100,
        height: 100,
        marginRight: 10
    },
    rightContainer: {
        flex: 1
    },
    title: {
        fontSize: 20,
        marginBottom: 8
    },
    name: {
        color: '#656565'
    },
    separator: {
      height: 1,
      backgroundColor: '#DDDDDD',
    },
    listView: {
      backgroundColor: '#F5FCFF'
    },
    activityIndicator: {
      flex: 1,
      flexDirection: 'column',
      justifyContent: 'center',
      alignItems: 'center',
    },
    loadingMessage: {
      flex: 1,
      fontSize: 20,
      color: '#656565',
    }
});

module.exports = EntryList;
エントリーの詳細を表示する
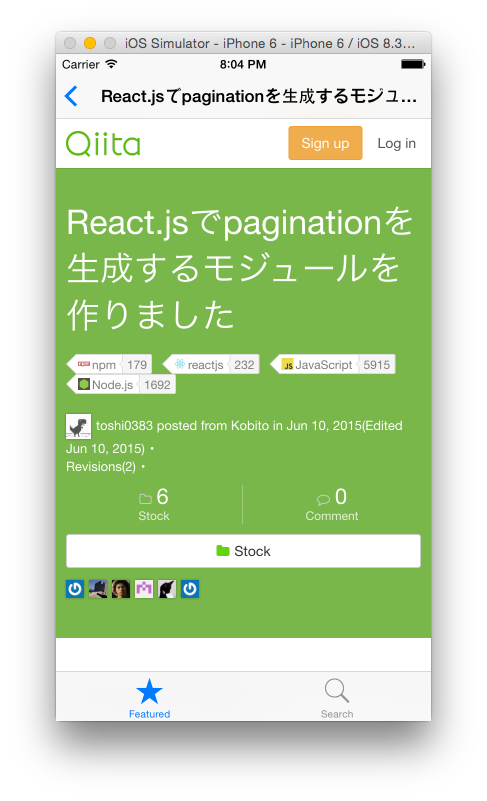
現状、エントリーのListをタップしてもListがハイライトされるだけで、エントリーの詳細を確認出来ない。そこで、エントリの詳細をWebViewで閲覧できるようにする。Qiita_ReaderプロジェクトにEntryDetail.jsという名前で新しいファイルを作成し、以下の内容で編集を行う。
'use strict';

var React = require('react-native');
var {
    WebView
} = React;

var EntryDetail = React.createClass({
  render: function(){
    return(
      <WebView
        url={this.props.url}
      />
    );
  }
});

module.exports = EntryDetail;
また、EntryList.jsに以下のを追記する
var EntryDetail = require('./EntryDetail.js');

...

renderEntry: function(entry){
  return(
    <TouchableHighlight onPress={() => this.onPressed(entry)}>
      <View>
        <View style={styles.container}>
          <Image
          source={{uri: entry.user.profile_image_url}}
          style={styles.thumbnail}/>
          <View style={styles.rightContainer}>
            <Text style={styles.title}>{entry.title}</Text>
            <Text style={styles.name}>{entry.user.id}</Text>
          </View>
        </View>
        <View style={styles.separator}/>
        </View>
    </TouchableHighlight>
  );
},
onPressed: function(entry) {
  this.props.navigator.push({
    title: entry.title,
    component: EntryDetail,
    passProps: { url: entry.url }
  })
},
これにより取得したエントリで詳細を確認したいものをタップするとWebViewで閲覧が可能になった。
エントリーの検索機能を追加する
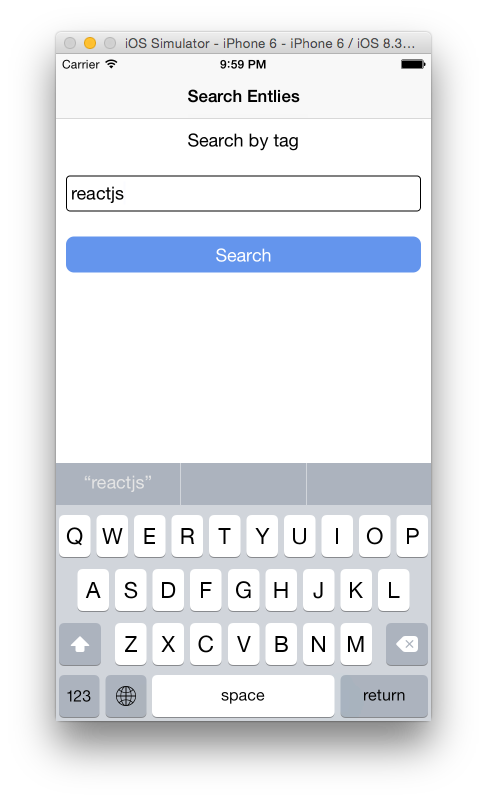
フォームにタグ名を記入して検索すると、そのタグ名を持つエントリをListViewで表示する機能を追加する。SearchEntry.jsを開き必要なComponentを追加する。
var {
  StyleSheet,
  Text,
  View,
  TextInput,
  TouchableHighlight
} = React;
SearchEntry Component、stylesを以下のように編集してフォーム画面を実装する。
var SearchEntry = React.createClass({
  render: function() {
    return (
      <View style={styles.container}>
        <View>
          <Text style={styles.instructions}>Search by tag</Text>
        <View>
          <TextInput style={styles.searchInput} />
        </View>
        </View>
        <TouchableHighlight style={styles.button}
        underlayColor='#f1c40f'
        >
          <Text style={styles.buttonText}>Search</Text>
        </TouchableHighlight>
      </View>
    );
  }
});

 var styles = StyleSheet.create({
  container: {
    marginTop: 65,
    padding: 10
  },
  description: {
    fontSize: 18,
    backgroundColor: "#FFFFFF"
  },
  instructions: {
    fontSize: 18,
    alignSelf: 'center',
    marginBottom: 15
  },
  searchInput: {
    height: 36,
    marginTop: 10,
    marginBottom: 10,
    fontSize: 18,
    borderWidth: 1,
    flex: 1,
    borderRadius: 4,
    padding: 5
  },
  button: {
    height: 36,
    backgroundColor: '#6495ED',
    borderRadius: 8,
    justifyContent: 'center',
    marginTop: 15
  },
  buttonText: {
    fontSize: 18,
    color: 'white',
    alignSelf: 'center'
  }
});
これだけでそれっぽい画面ができる。
続いて、検索機能のロジックを実装する。
'use strict';

var React = require('react-native');
var EntryList = require('./EntryList.js');

var {
  StyleSheet,
  Text,
  View,
  TextInput,
  TouchableHighlight,
} = React;

var SearchEntry = React.createClass({
  getInitialState: function(){
    return(
      {
        tagName: '',
        errorMessage: ''
      }
    );
  },
  tagInput: function(e){
    this.setState(
      {
        tagName: e.nativeEvent.text,
      }
    );
  },
  searchEntry: function(){
    this.fetchData();
  },
  fetchData: function(){
    var baseURL = 'https://qiita.com/api/v2/tags/' + this.state.tagName + '/items';
    console.log(baseURL);
    fetch(baseURL)
    .then((response) => response.json())
    .then((responseData) => {
      if (responseData.title !=='') {
        // this.setState(
        //   {isLoading: false}
        // );
        this.props.navigator.push({
          title: 'Search Results',
          component: EntryList,
          passProps: {entries: responseData}
        });
      }else{
        this.setState({ errorMessage: 'No results found'});
      }
    })
    .catch(error =>
           this.setState({
             errorMessage: error
           }))
           .done();
  },
    viewLoadingData: function(){
        return(
              <View style={styles.activityIndicator}>
              <ActivityIndicatorIOS
              animating={1}
              size={'large'}
              />
              <View>
                 <Text style={styles.loadingMessage}>Pleae wait a second ...</Text>
              </View>
              </View>
            );
      },
  render: function(){
      return(
        <View style={styles.container}>
          <View>
            <Text style={styles.instructions}>Search by tag</Text>
          <View>
            <TextInput style={styles.searchInput} onChange={this.tagInput}/>
          </View>
          </View>
          <TouchableHighlight style={styles.button}
            underlayColor='#000080'
          >
            <Text style={styles.buttonText} onPress={this.searchEntry}>Search</Text>
          </TouchableHighlight>
          <Text style={styles.errorMessage}>{this.state.errorMessage}</Text>
        </View>
      );
  }
});

var styles = StyleSheet.create({
  container: {
    marginTop: 65,
    padding: 10
  },
  description: {
    fontSize: 18,
    backgroundColor: "#FFFFFF"
  },
  instructions: {
    fontSize: 18,
    alignSelf: 'center',
    marginBottom: 15
  },
  searchInput: {
    height: 36,
    marginTop: 10,
    marginBottom: 10,
    fontSize: 18,
    borderWidth: 1,
    flex: 1,
    borderRadius: 4,
    padding: 5
  },
  button: {
    height: 36,
    backgroundColor: '#6495ED',
    borderRadius: 8,
    justifyContent: 'center',
    marginTop: 15
  },
  buttonText: {
    fontSize: 18,
    color: 'white',
    alignSelf: 'center'
  },
  errorMessage: {
    fontSize: 15,
    alignSelf: 'center',
    marginTop: 15,
    color: '#FF4500'
  },
});

module.exports = SearchEntry;
検索したEntryをListViewで表示する部分はEntryList.jsを少し変更して使いまわしている。変更点は以下の通り。
componentDidMount: function(){
  if(typeof this.props.entries !== 'undefined'){
    console.log("I'm in search condition");
    this.setState(
      {
        dataSource: this.state.dataSource.cloneWithRows(this.props.entries),
        isLoaded: true
      }
    );
  }else{
    this.fetchData();
  }
}
アプリケーションのアイコンと起動時の画像の登録
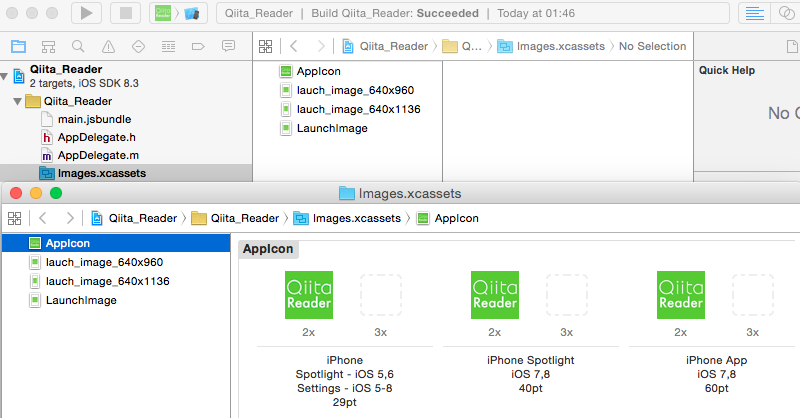
最後に、Launch Screen、AppIconに自分で作成した画像を登録する。AppIconの登録はXcodeプロジェクトのImages.xcassetsに入っているAppIconに画像を登録するだけ。
AppIconはiPhone,iPhone Spotlight, iPhone Appの3つの画像が登録できる。それぞれのサイズは29pt,40pt,60ptで指定されているが、実際には2x,3xの画像を登録する必要があるみたいなので、僕は58pt,80pt,120ptの画像を用意した。
また、Launch Screenに画像を登録するには、LaunchImageを有効にする。
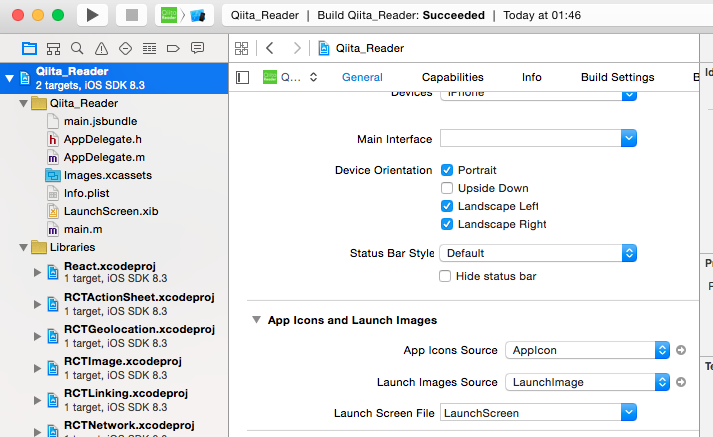 LaunchScreenxibを開きImageViewと任意の画像を追加することでアプリケーション起動時の画像が設定できる。
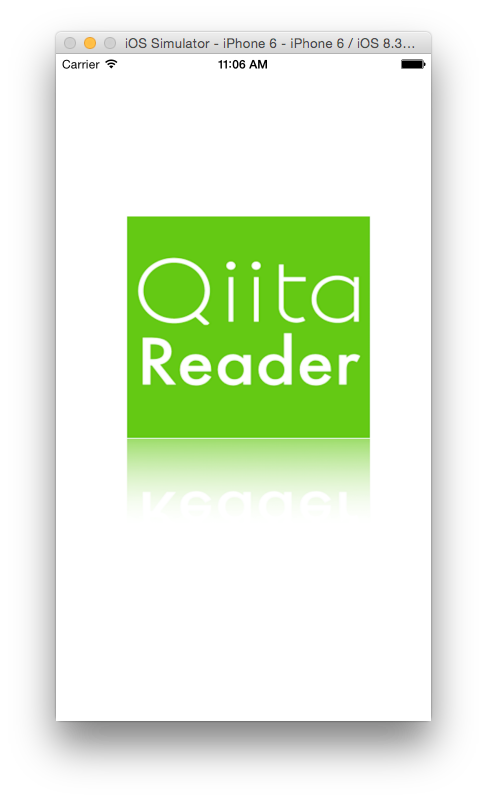
完成!!
感想
React Nativeを使うことで本当に気軽にアプリケーションを作れた。Objective-CやSwiftでの実装と異なりパフォーマンスやアニメーションに難があるという意見をたまに聞くが、一個人としてiosアプリケーションを開発するなら問題ないと思われる。Reactの記法は個人的にはとても好みの記法なのでこれからも時間を見つけて色々作って見たいと思う。React.jsユーザ増えてくるにつれて、React Nativeに興味を持つ人が確実に増えるだろうから今後が非常に楽しみなSDKである。
参考
React Native公式ドキュメント
- Getting Started /React Native | A framework for building native apps using React
- Tutorial / React Native | A framework for building native apps using React
- React Native: Bringing modern web techniques to mobile
他の人のReact Native使用感
- reactjs - React Native ファーストインプレッション - Qiita
- huin.log / React Nativeについてのメモ
- iOS - ReactNativeでサクッとReactjs記事リーダーを作ってみる - Qiita
- Introduction to React Native: Building iOS Apps with JavaScript

